
Quirky-Traditional Book Case Styling
One of our clients recently bought a beautiful, Victorian house. We have been helping her with this house from before she moved in.
Phase I: full-house interior paint color consultation.
Phase II: plan for where to place furnishings after moving in.
Most recently, Phase III: art placement and styling of floor-to-ceiling dining room built-in.
The built-in project proved trickier than we would have originally predicted, but we got some good take-aways from the experience.
Styling Goals
Our client wanted to display a collection of more than 20 teacups and saucers. She also had a number of antique clocks she wanted on the shelves, as well as many serving bowls and some special keepsakes. Before we arrived, she had unpacked everything she hoped to get on the shelves:
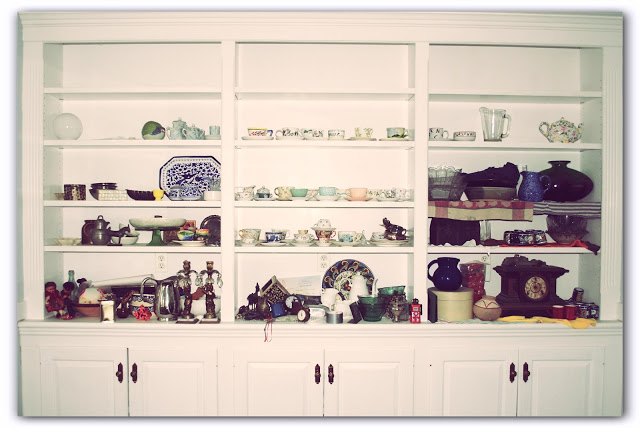
Dining room built-in with all possible items for display. Note the uniform height of the shelves, in all 3 sections of the cabinet.
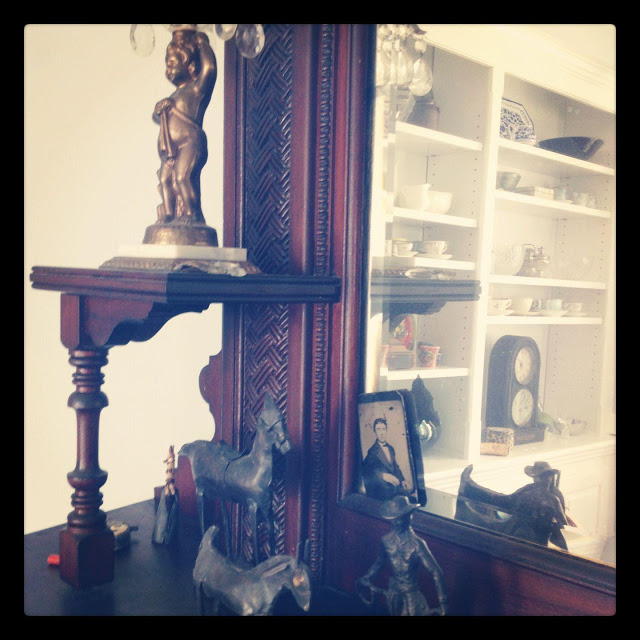
She also had display space on a lovely, antique fireplace on the adjacent wall:
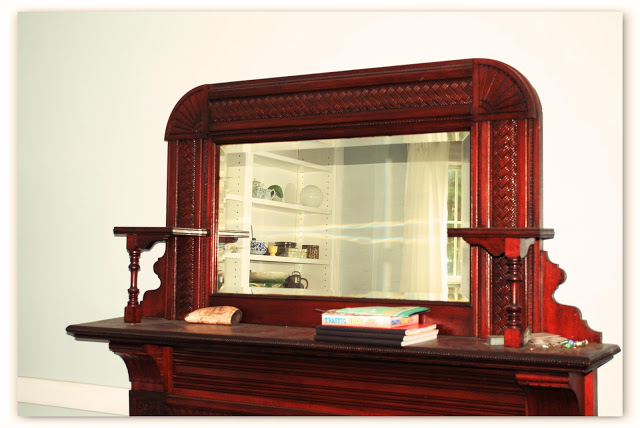
The mantle provided another place to display treasured items.
Styling Strategies
After asking the client her preferences on a few things, we started with three parameters, to make the project easier:
1. We would make the height of the shelves random, to create a more casual, quirky look
2. We would place the clocks at an angle, rising up the built-in from bottom left to higher right
3. We would group the teacup sets, and "sandwich" them between two closely set shelves in each
section of cabinet.
Working within parameters is one of the best ways to be efficient and accomplish a desired outcome when designing rooms. There are so many items with which you're always working: color, texture, size, shape, function, light. If you can identify your non-negotiables and must-haves, followed by your top priority needs and wants from the space, you can start to narrow the hundreds of possible combinations of elements.
Styling Challenges
We were about 25 percent of the way through our effort of placing items on the built-in shelves when we discovered that we were inefficiently moving and re-moving the shelves to fit the objects we wanted to display. We realized we should have been working from left to right, and from bottom to top, in order to determine where the shelves should be placed.
For instance, we knew we wanted to put a large clock on the bottom left. That dictated the height of the shelf above it. Next, we needed to determine what looked good to the right of the clock, in the center column of the built-in. Once that was in place, we could install the shelf above it. And so on.
Before starting, we had a general idea of where we wanted to place things, and how we wanted the shelves to look, but there was no way around trial and error as we moved our way up the case. It was impossible to predict how things would look before they were up on the shelves.
All told, the project of styling the shelves took 2 hours. We predicted 1.25 hours, so we learned about the time it takes to do something that complex. We have recommended that our client paint the back of the case Benjamin Moore 1616/Stormy Sky, in order to accentuate the display and create a dramatic counterpoint to the dining room's blue wall color. Ideally, we would have all thought of this and had the painting completed before the styling. But if there's something we have made peace with on every job, it's that there is always a great idea that hits you at the end!
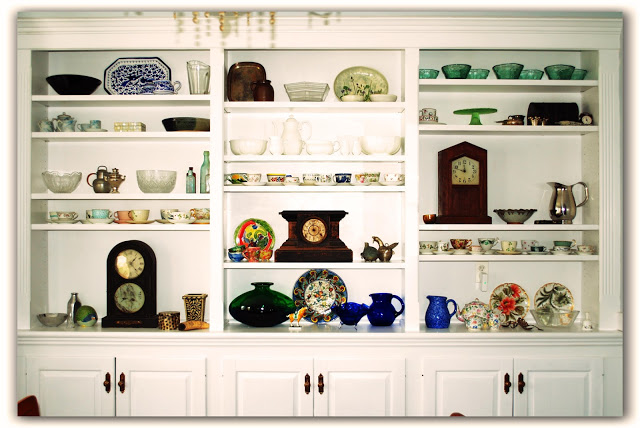
The final result, after realizing we could work more efficiently styling left-to-right, bottom-to-top.
We post regular project updates and thoughts on our travels through the design world on our Facebook page. "Like" us to stay in touch.